


Bookcraft. Part 3
Description
This section is from the book "Arts And Crafts In The Elementary School", by Joan Dean. Also available from Amazon: Arts And Crafts In The Elementary School.
Bookcraft. Part 3
Paste out the long wide piece and lay the card so that it overlaps the cloth up to the side lines and so that it lies between the top and bottom lines. Turn the top and bottom cloth over and press it into position, being specially careful to press the cloth into position over the thickness of the card. Now paste the other wide strip and place this on top of the first piece on the inside of the cover so that it covers the raw edges of card and the pasted cloth. Arrange it so that it overlaps equally at the top and bottom. Lift the long edges and press the cloth carefully round the thickness of the cardboard as in the single-section book. Now press the cloth into position on the cardboard.
First piece of cloth in position

Paste out one of the remaining two pieces of cloth and lay the cardboard on it so that the overlap occurs on the same side as before. Place the card so that it just touches the edge line and the top and bottom lines. Mitre the corners as for the single-section book and press the cloth down. Repeat for the other side of the folder.
Paper, plain or patterned, is now needed for the outside. You can if you wish, omit the cloth edging, and finish the cover with paper. A cover with a cloth edging can be finished as follows. Measure with a piece of paper, the distance between the inside edge of the cloth at the side of the cover and the edge of the cloth at the centre. Add half an inch to it to allow for a quarter of an inch overlap at each side. Measure the length of the cover and add one and a half inches for the top and bottom overlap. Draw this out on the back of your paper and cut it. It is as well to measure each of the four distances required separately, because differences tend to creep in which may spoil the final work. Paste the paper and stick it into position. Repeat for the other side of cover.
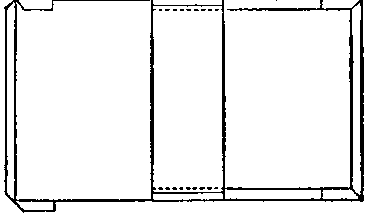
Inside of folder showing all pieces of cloth in position
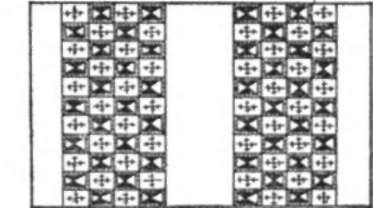
The two pieces of patterned paper in position on the outside of the cover.
Finally, cut two pieces of paper for the inside of the cover which are each half an inch less in each dimension than the size of the card. Paste these and place in position. Let the work dry out under light pressure. If you wish, eyelets can be bought and inserted with a special tool.

Inside papers in position on one side

The finished folder
It is always useful to think of ways of rescuing work which has, for one reason or another, gone astray. One of the commonest mistakes in bookcraft is to cut cloth or paper too short, leaving bare card or raw edges. This is a less likely fault if children are encouraged to measure off one piece of paper against another and to measure by making marks on a strip of paper rather than always turning to the ruler. It can also gradually be eliminated by encouraging children to look critically at measurements and to estimate whenever possible. "When it does happen, however, the fault can often be disguised by covering the gap with a strip of contrasting paper. Quarter-inch wide coloured Sellotape is ideal for this job, and often adds considerably to the appearance of the work.
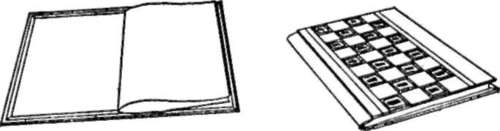
Strips of Sellotape can be used to cover faults
These are all simple methods of making books. There is no reason, however, when space, numbers and equipment allow, why top Juniors should not reach a stage of making multisection books. The skill required is certainly not outside the range of a 10-year-old with a good background of craft work. Top Juniors could also be introduced to equipment for cutting page edges.
This sort of work is a logical outcome of work in other subjects and could lead on to a study of book and newspaper production. In whatever way the subject is tackled it should lead to a critical appreciation of the appearance of books.
Finally, some useful things to remember:
1. Always paste over the edge of the paper—in this way you can be sure of pasting to the very edges.
2. If possible, have a pile of torn-up newspapers for each child. When each piece of pasting has been done, the newspaper used can be screwed up ready for throwing away .This ensures that the paste goes only on to those parts of the books for which it was intended.
3. When leaving work to dry out, remember that damp from paste penetrates. It can make the pages inside a book curl up if they are not adequately protected. Newspaper placed between the endpapers does this reasonably well, but a waterproof material such as polythene, would be better.
4. Never leave work to dry out without placing it under light pressure.
5. Measuring by marks on the edge of a piece of paper is often more satisfactory than by using a ruler. In any case, children should always ask themselves, "Does it look right?"
Continue to:


My Books

