How To Make A Tool Box
Description
This section is from the book "Carpentry For Beginners - Things To Make", by John D. Adams. Also available from Amazon: Make Magazine.
How To Make A Tool Box
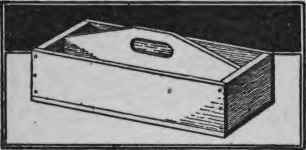
It may be a slat on the chicken coop is broken, perhaps a picket on the front fence is loose or something is wrong with the wireless outfit on the top of the barn - but whatever it is you will find it a great convenience to have a box with a handle so that you can carry the necessary tools and nails to where they are needed to make repairs.
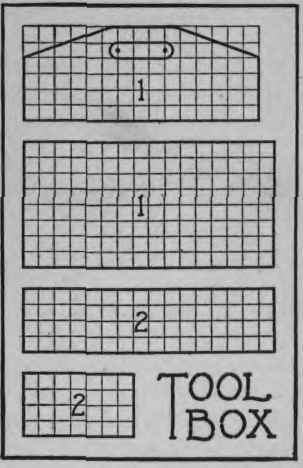
There are six pieces of wood in the box illustrated, and you will get a clear idea of their sizes and shapes from the working drawing, in which each small square represents exactly one inch. The boards should be one-half inch thick, but if they are a little thicker it will not matter, provided you proceed in the proper order.
First saw the side and end pieces off squarely to the exact length. Nail these together and then measure the size of the bottom, which should next be nailed on. The center piece is six inches wide and should now be cut just long enough to fit in snugly between the ends. Mark out the upper part as shown in the drawing, but before cutting off the triangle at each of the upper corners, bore two one-inch holes and cut out the wood in between them, so as to form the handle. Nail this piece in place, exactly in the center, driving the nails in through the ends and up through the bottom.
Sometimes these boxes are divided up on one side with several thin cross partitions, so as to form a number of pockets for the different sizes of nails and screws that are generally used. If such a box is desired, one of the sides must be left off until the small partitions are securely fastened in place by nailing in through the center board.
A box for holding knives and forks in the kitchen may be made in the same way as the plain tool box, except that it is not so large and the wood is thinner.
Continue to:
My Books

