Lesson XIII. Back-Saw And Bench-Dog
Description
This section is from the book "Manual Training: First Lessons In Wood-Working", by Alfred G. Compton. Also available from Amazon: First Lessons In Wood-Working.
Lesson XIII. Back-Saw And Bench-Dog
The pieces you have been working on are now of the uniform thickness of half an inch and of the breadth of 5 3/4 inches. They are still marred, however, by the nail-holes made in them in a former exercise. They are now to be cut off square, a little shorter than before, and smoother at the ends than we were able to make them with the ordinary cross-cut-saw. For this work we will use the "back -saw" or "tenon -saw." This saw is shorter and thinner than the one you have used before, and has more teeth to the inch. Its teeth also are not bent sideways or "set" as much as those of the cross-cut-saw. Examine the two saws carefully, and compare them in these particulars. The back-saw being thinner than other saws is more likely to bend. To prevent bending it is provided with a stiff back, which gives it its name.
While this allows the saw to be made thinner, and therefore fits it for finer work, it limits, of course, the depth of the cut that can be made with it. A back-saw still smaller, thinner, and finer than the tenon-saw that you have, and with no set to its teeth, is called a "dove-tail" saw.
In working with small back-saws, it is generally the case that a number of pieces are to be cut in quick succession. Too much time would be wasted if these were all to be fastened in the vise before cutting them, and besides, the firm grip of the vise is not necessary. Small pieces are most conveniently cut on the "bench-dog" which you find on your bench, and which is shown, in elevation and plan, in Fig. 31. Lay the dog on your bench, one of the cross-strips being downward and resting against the front of the bench. Laying the piece that is to be cross-cut on the dog and resting against the other cross-strip, with the end that is to be cut off projecting a little beyond the right-hand edge of the dog, you can easily hold it with the left hand, and cut off the piece required. In the case of the pieces you have been using we will cut off enough to remove the nail-holes. Half an inch at each end of the long pieces will suffice for this. This will reduce the long pieces to 11 1/2 inches, and, to keep nearly the same proportion of length to breadth as before, we will take off | of an inch from each end of the short pieces, reducing them to 7 1/4 inches.

Fig. 31.
Having made the necessary pencil-marks with the square, as in Lesson VIII (Making A Nailed Box. Laying Out The Work)., remembering all the cautions there given as to working with your square always from the same edge and side, allowing for the waste of the saw, and so on, you will proceed to cut off the narrow pieces from the ends, making first a few trial cuts on another piece, to get the necessary steadiness of hand. In cutting with the back-saw, hold the saw with its edge nearly parallel to the surface of the piece, but let the tip of the saw drop a little at first, so as to begin the cut at the farther edge of the board. Remember the injunctions to cut slowly at first, to keep the saw upright, not to force it, and to cut gently when the saw is nearly through. If you have carried the pencil-marks all round the pieces, there will always be one of the marks on the faces and one of those on the edges in view to guide you.
The pieces being now, if your work has been well done, exactly alike in pairs, are ready to be formed into a box of much better finish than the one first made with nails. We will put it together with "dove-tail" joints; but before this can be done it will be necessary to acquire some skill in the use of the chisel. Two other pieces may be cut out and planed up for the top and bottom. You may determine the proper size for these, and lay them out and get them ready yourself.
Exercise 24. Cross-Cutting With Back-Saw
In cutting out these pieces you will have to saw lengthwise of the grain, and will use the "rip-saw" for this purpose. You will observe that this has larger teeth than the cross-cut-saw, that the front faces of the teeth are square instead of having sharp edges, and that the angle of the tooth is smaller. On considering a little you will see that these differences are in accordance with what we have learned about the different strength of wood in different directions. The lower edge of the tooth of the rip-saw, at a, Fig. 32, has to cut across the fibers, and must therefore be sharp. The front a b has only to push the pieces out, and is therefore blunt. In the case of the cross-cut saw, it is the front edge c d that cuts across the grain, and is therefore filed sharp, and the pieces are pushed out by the point c. Furthermore, as the edge c d is to cut the fibers, it will work best when it falls on them not quite perpendicularly, but obliquely, which is the reason why c d is not perpendicular to the edge of the saw, as a b is.
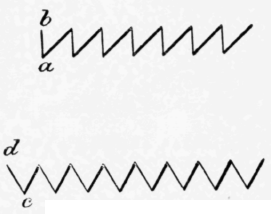
Fig. 32.

Fig. 33.
On the other hand, the corner a of the tooth of the rip-saw, being a sort of chisel, works best when driven obliquely across the fibres. In ripping the piece D E, therefore, Fig. 33, the saw should be held as shown, rather than perpendicular to the length of the board, In making a long cut with the rip-saw, you will sometimes be hindered by the springing together of the parts that are already cut, causing them to "pinch" the saw and resist its motion. The remedy for this is to insert a wedge, such as a chisel, a screw-driver, or a piece of wood, in the cut near the saw. Towards the end of the cut care must be taken that this wedge does not split the board.
The six pieces are now to be put away while the use of the chisel is being learned, by which time they will be thoroughly seasoned. They must be set up on edge with a space of at least an inch between them for circulation of air, so that they may not warp. You may mark on each piece its exact dimensions, and note, when you take it up again, how much it has shrunk in each direction.
Continue to:
My Books

